
Claude Desktop을 활용하여 간단하게 MCP를 구현하는 방법에 대해서 작성해보고자 합니다. MCP를 사용하는 방법에는 여러가지가 있을 수 있지만, 가장 간단하게 구현할 수 있는 방법은 Claude Desktop을 활용하는 것 같습니다.
( 출처 : https://insight.infograb.net/blog/2025/01/22/mcp/, https://modelcontextprotocol.io/quickstart/server)
Claude Desktop은 아래의 주소에서 다운로드 받을 수 있습니다.
Download Claude
Download Claude for your desktop or mobile device.
claude.ai
위의 출처에 제시한 블로그에서는 Claude에서 최신 정보를 검색하고, 파일 이동 등을 구현했는데요. 이를 하나 하나 소개해보고자 합니다.
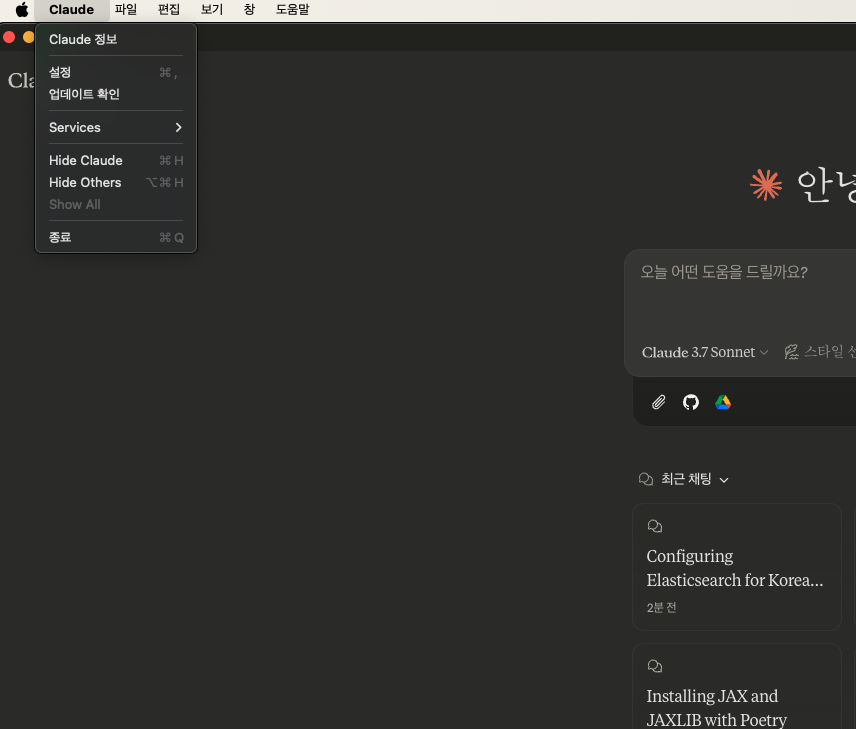
우선 설정 방법입니다. Claude 를 맨처음 설치하시고 로그인 하시면(현재 Pro 계정에서만 가능합니다) 아래의 화면을 보실 수 있습니다. 위에 Claude를 클릭하시고 설정을 클릭하시면 됩니다.


설정으로 들어가면 이와 같은 창이 하나 뜨게 되는데 여기서 개발자 혹은 Developer를 클릭하시면 위와 같은 화면을 보실 수 있습니다. 여기서 설정편집을 클릭하시면 아래의 위치에 구성 파일이 생성되는데 해당 파일을 열면 아무것도 없습니다.
맥 OS: ~/Library/Application Support/Claude/claude_desktop_config.json
윈도우: %APPDATA%\Claude\claude_desktop_config.json
1) 파일 시스템
여기에 아래와 같이 입력해주시면 되는데
# 맥/리눅스
{
  "mcpServers": {
    "filesystem": {
      "command": "npx",
      "args": [
        "-y",
        "@modelcontextprotocol/server-filesystem",# 파일 시스템 관련 테스크
        "/Users/username/Desktop", #username 변경, 허용되는 폴더 지정
        "/Users/username/Downloads" #username 변경
      ]
    }
  }
}

# 윈도우

{
  "mcpServers": {
    "filesystem": {
      "command": "npx",
      "args": [
        "-y",
        "@modelcontextprotocol/server-filesystem",
        "C:\\Users\\username\\Desktop", # username 변경
        "C:\\Users\\username\\Downloads" # username 변경
      ]
    }
  }
}
단, 이를 실행하기 위해서는 node.js가 설치 되어 있어야 합니다. 아래 와 같이 터미널 혹은 cmd에서 확인하시고 없으시다면 설치해주세요.
node --version
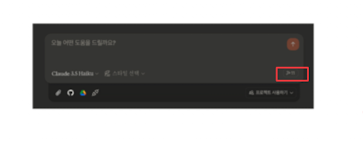
이후 Claude를 재실행해부면 아래와 같은 망치 모양이 생성된 걸 확인하실 수 있습니다 (현재 3.5 부터 가능한 것 같습니다. 되지 않는다면 3.5로 버전을 낮추어 확인해주세요)
그렇게 망치 버튼을 클릭해보면 아래와 같은 내용이 뜹니다.
Claude는 모델 컨텍스트 프로토콜(MCP)을 사용하여 전문 서버에서 제공하는 도구를 활용할 수 있습니다.
create_directory
Create a new directory or ensure a directory exists. Can create multiple nested directories in one operation. If the directory already exists, this operation will succeed silently. Perfect for setting up directory structures for projects or ensuring required paths exist. Only works within allowed directories.
directory_tree
Get a recursive tree view of files and directories as a JSON structure. Each entry includes 'name', 'type' (file/directory), and 'children' for directories. Files have no children array, while directories always have a children array (which may be empty). The output is formatted with 2-space indentation for readability. Only works within allowed directories.
edit_file
Make line-based edits to a text file. Each edit replaces exact line sequences with new content. Returns a git-style diff showing the changes made. Only works within allowed directories.
get_file_info
Retrieve detailed metadata about a file or directory. Returns comprehensive information including size, creation time, last modified time, permissions, and type. This tool is perfect for understanding file characteristics without reading the actual content. Only works within allowed directories.
list_allowed_directories
Returns the list of directories that this server is allowed to access. Use this to understand which directories are available before trying to access files.
list_directory
Get a detailed listing of all files and directories in a specified path. Results clearly distinguish between files and directories with [FILE] and [DIR] prefixes. This tool is essential for understanding directory structure and finding specific files within a directory. Only works within allowed directories.
move_file
Move or rename files and directories. Can move files between directories and rename them in a single operation. If the destination exists, the operation will fail. Works across different directories and can be used for simple renaming within the same directory. Both source and destination must be within allowed directories.
read_file
Read the complete contents of a file from the file system. Handles various text encodings and provides detailed error messages if the file cannot be read. Use this tool when you need to examine the contents of a single file. Only works within allowed directories.
read_multiple_files
Read the contents of multiple files simultaneously. This is more efficient than reading files one by one when you need to analyze or compare multiple files. Each file's content is returned with its path as a reference. Failed reads for individual files won't stop the entire operation. Only works within allowed directories.
search_files
Recursively search for files and directories matching a pattern. Searches through all subdirectories from the starting path. The search is case-insensitive and matches partial names. Returns full paths to all matching items. Great for finding files when you don't know their exact location. Only searches within allowed directories.
write_file
Create a new file or completely overwrite an existing file with new content. Use with caution as it will overwrite existing files without warning. Handles text content with proper encoding. Only works within allowed directories.
현재 가능한 태스크를 정리해두었는데요. 위와 같이 설정을 하면 파일 관련 테스크에 대해서 실행할 수 있음을 보실 수 있습니다. 예를 들어 아래와 같이 실행해보도록 하겠습니다. 만약 데스크탑 폴더에 있는 img.png라는 이미지를 다운로드 폴더로 옮겨 달라는 질문을 던지면
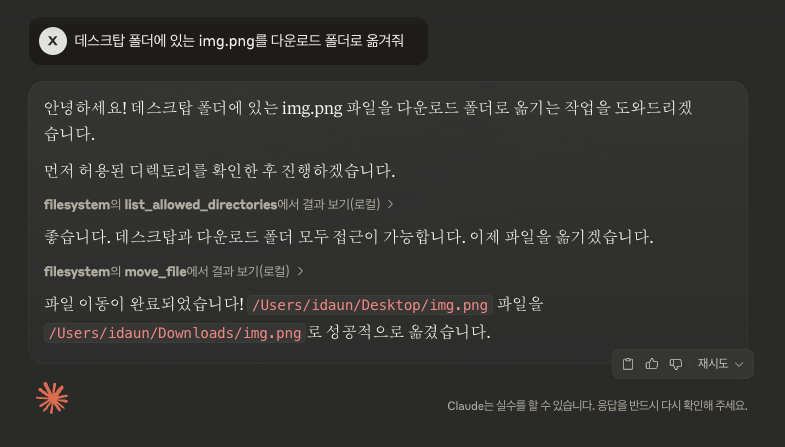
아래와 같은 단계로 진행하게 됩니다. 해당하는 단계는 모두 허가를 얻고 진행하게 됩니다.
1. 허용된 폴더인지 여부 확인
2. 파일 이동
그 다음으로 최신 정보를 검색해오는 태스크를 진행해보도록 하겠습니다
2) 최신 정보 검색
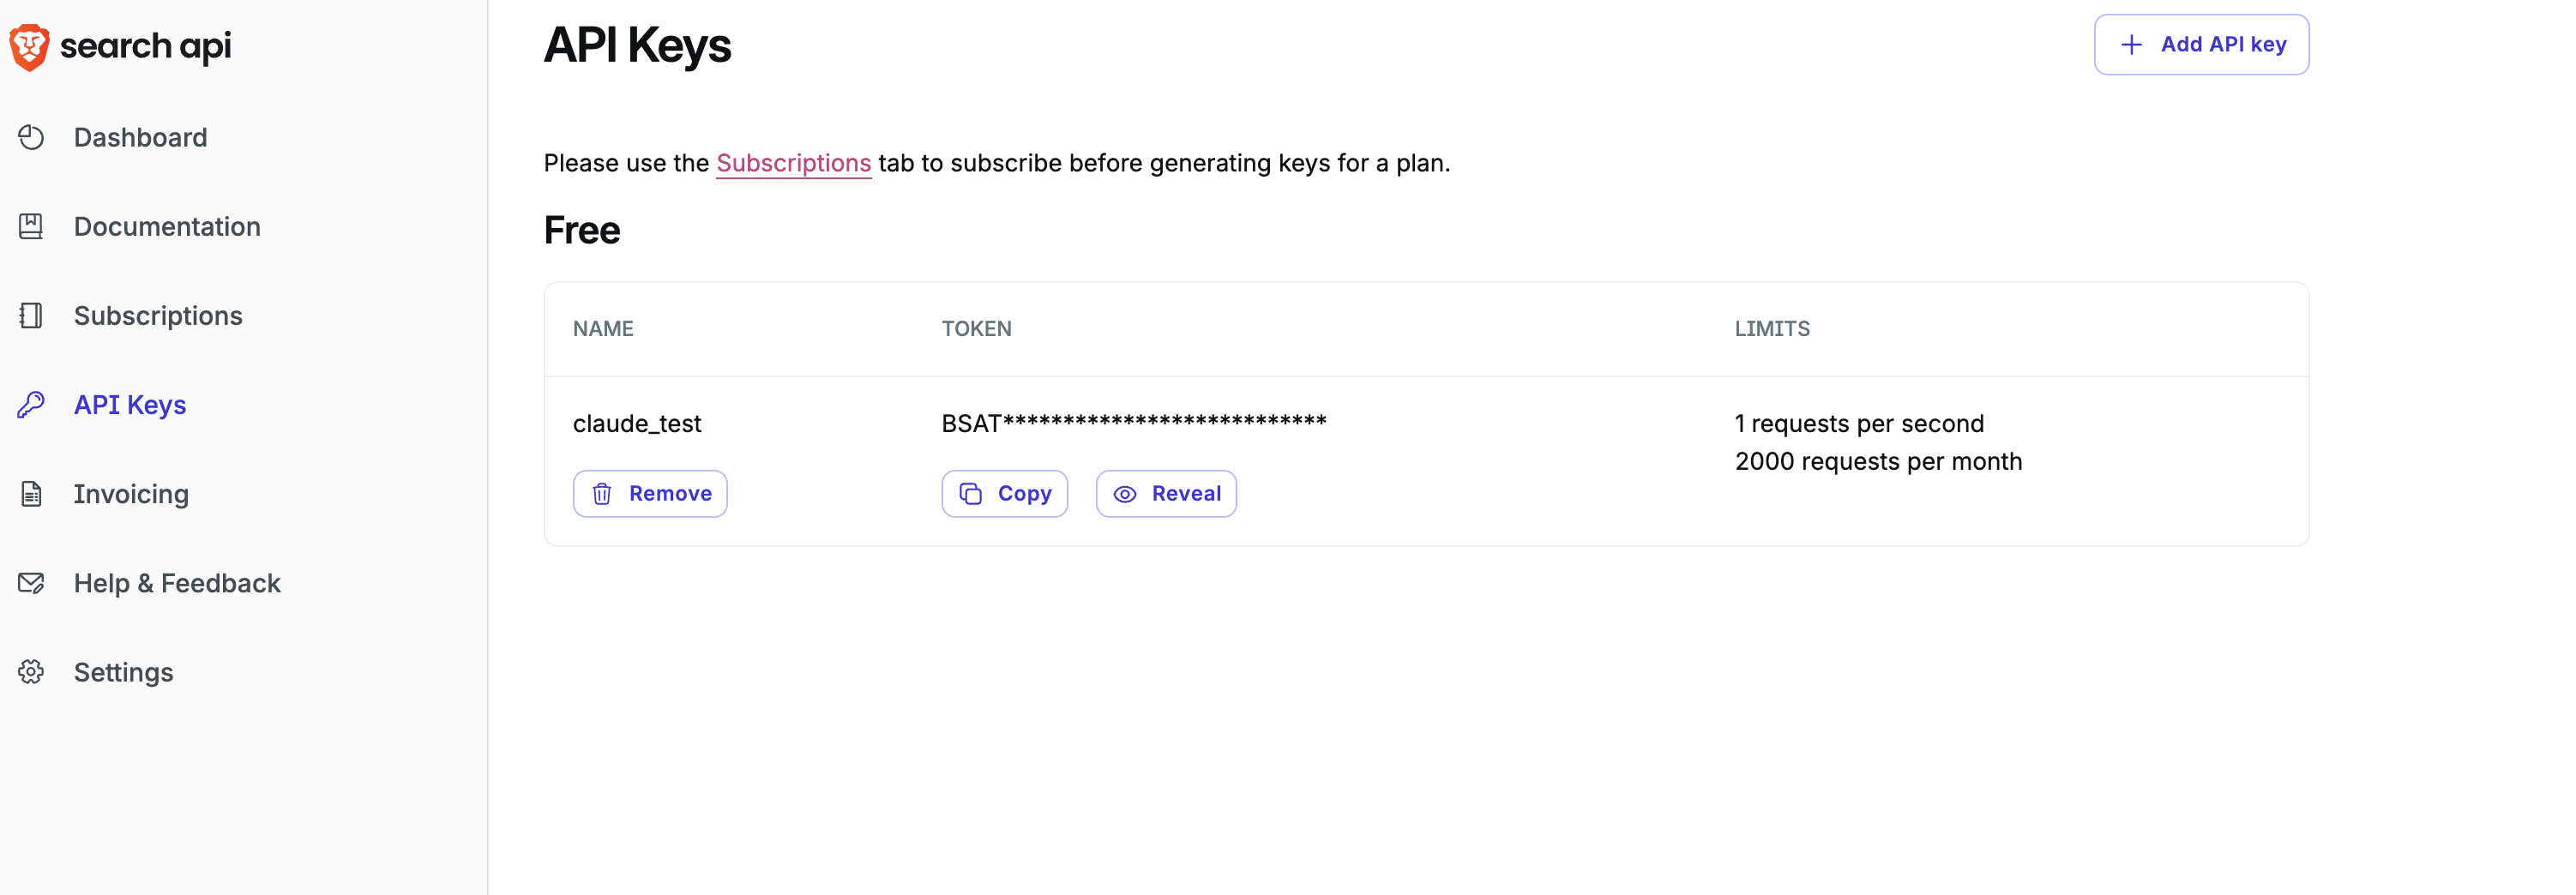
우선 최신 정보 검색을 위해서 (최근 Claude에 검색 기능이 추가되긴 했습니다.) brave search api 회원가입을 진행해주시고, Free plan을 구독하신 다음, api key를 발급 받아주시면 됩니다.
그 다음 이전에, 파일 시스템에 접근하기 위해 설정했던 파일을 수정해서, 아래와 같이 변경하고 다시 실행해줍니다.
{
  "mcpServers": {
    "filesystem": {
      "command": "npx",
      "args": [
        "-y",
        "@modelcontextprotocol/server-filesystem",
        "/Users/idaun/Desktop",
        "/Users/idaun/Downloads"
      ]
    },
    "brave-search" : {
    "command": "npx",
       	"args": [
        "-y",
        "@modelcontextprotocol/server-brave-search",
      ],
      "env" : {
      "BRAVE_API_KEY" : "YOUR_API_KEY" # API 키 설정
      }
      }
  }
}
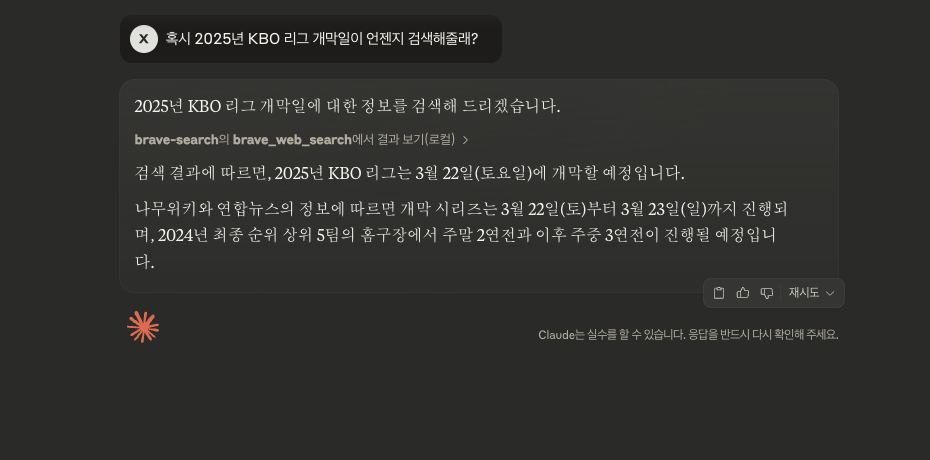
이렇게 검색이 필요한 질문에 대해서 답변해주는 모습입니다.
위의 두가지 태스크 처럼 config 파일만 잘 작성한다면 쉽게 MCP를 적용할 수 있습니다.
이외에도 MCP는 여러 예시 서버들을 구현해두었는데요. 해당 서버들은 아래를 참조해서 확인해보시면 좋을 것 같습니다.
https://github.com/modelcontextprotocol/servers/tree/main/src
servers/src at main · modelcontextprotocol/servers
Model Context Protocol Servers. Contribute to modelcontextprotocol/servers development by creating an account on GitHub.
github.com
'A.I.(인공지능) & M.L.(머신러닝) > Agent' 카테고리의 다른 글
| Figma-MCP (0) | 2025.04.01 |
|---|---|
| 로컬환경에서 MCP 구현 (0) | 2025.03.24 |
| MCP (Model Context Protocol) 소개 (0) | 2025.03.24 |


